Sunday 27 October 2013

Apple and Cinnamon Bagels


Apple and Cinnamon Bagels
I said it wouldn't be long until I made bagels again, and here they are!

I made them using some flour my Gran gave to me, she has previously made loaves and rolls with it, but I thought I'd try something a bit different! If you can't get hold of flour like this you can just add a couple teaspoons of cinnamon to your dough and a grated apple to get a similar effect.


Special flour

Apple and Cinnamon Bagels


Makes 8

Ingredients

450g apple and cinnamon bread flour (or strong white bread flour as discussed above)
4tbsp sugar
1tsp salt
7g/2tsp dried yeast

3tsp sugar
Activated yeast
1tsp cinnamon (both for dusting)

190oC fan oven/200oC other ovens


Method:

1. In a large bowl add 100ml of warm water to 1tbsp sugar and the sachet of yeast. Leave for 10 minutes to activate the yeast - you'll start to see bubbles appear on the surface of the liquid.


2. Add another 200ml of warm water to the bowl, followed by half the flour and the 1tsp salt. Mix into a dough, and add the rest of the flour in stages until you get a soft, but not sticky dough, you might not need all of the flour.
Ready to proof

3. Turn the dough out on a lightly floured surface and knead gently for 10 minutes until the dough is smooth and elastic. (See this previous blog about the best kneading technique.)

4. Once smooth put the dough into an oiled bowl, covered with oiled cling film and leave in a warm place until doubled in size - approx. 1 hour, but don't be afraid to leave it for longer.

5. Turn the doubled dough out onto a lightly floured surface and cut into eight equal portions. Knead each into a smooth circle and then roll between your palms to get a smooth ball.

6. Put a large ban of water onto boil and add the remaining 3tbsp sugar. Bring to a rapid boil.

Shaped and boiling
7. Meanwhile, to make the bagel's characteristic hole press your thumb into the centre of each dough ball, then pick it up, work your other fingers into the space, making the hole bigger by gently pulling the dough outwards and cycling it around between your index fingers. Make the hole approx 3cm across. Repeat for all 8 dough balls.

8. Now your sugary water should be boiling, so add the bagels to the water (do as many in a go as you can fit in the pan without them touching each other or the sides), boil for 1 minute on each side and then remove from the water onto a wire rack with a slotted spoon.

9. Once you've boiled all of the bagels dust with caster sugar and cinnamon and place onto a greased and floured baking tray.
Sprinkled with sugar and cinnamon

10. Bake in the middle of a preheated oven for 20-25 minutes, or until they're dark brown and sound hollow when tapped on the bottom.

11. Cool on a wire rack. These will keep for 3-4 days if kept in an airtight container, but they're best enjoyed whilst still warm from the oven, or toasted with loads of butter, and more sprinkled cinnamon and sugar!

These were just as easy as the poppy seed variety I made a few weeks ago, so give them a try!


Finished bagels!
Happy Baking,

The Baking Ginger xx


Pesto, Basil and Mozzarella Couronne

Finished Couronne
I saw this type of loaf made a couple of times on the Great British Bake Off, and I love making stuff that looks as good as it tastes, so I thought I'd give it a go!

I didn't use a brioche dough, just a white loaf dough which I stuffed with pesto, basil and mozzarella, but you could add anything you fancy, maybe ham, cooked chicken or smoked salmon?


Dough before...


Pesto, Basil and Mozzarella Couronne

Ingredients:

500g/1.1lb strong white bread flour
25g/1oz marg or butter
2tsp salt
7g/2tsp dried yeast
350ml warm water

190g jar of pesto (any variety)
3 large handfuls of basil
Dough after...
50g/2oz grated mozzarella

11in diameter springform baking tin
200oC oven/180oC fan

Method:

1. Rub the marg or butter into the flour until it resembles breadcrumbs, then add the yeast and salt (to separate sides of the bowl) and mix.

2. Add the warm water in stages until the dough comes together but isn't sticky.

Ready to roll
3. Turn out onto a floured surface and knead for 10 minutes, or until the dough is smooth and elastic.

4. Place into an oiled bowl, cover with oiled clingfilm and leave to rise in a warm place until doubled in size (at least 1 hour).

5. Turn the risen dough out onto a floured surface, knead gently for 30 seconds to knock it back and then roll the dough out into a rectangle (approx. 1m x 50cm).

6. Cover the rectangle with the fillings of your choice, tack one of the long edges to the work surface and then roll from the opposite long edge like a swiss roll - do it as tightly as you can.

Mid-twist
7. Cut the ~1m long roll of dough lengthways down the centre of the roll, twist edge half individually until it has an even twist all the way along, then twist the two halves together, to effectively reform the ~1m long roll.

8. Starting at one end of the dough, roll the dough into a flat spiral, like a snails shell. Continue to the other end of the dough and then place your spiral into the greased circular baking tin.

9. Cover again with oiled clingfilm and leave to rise again in a warm place for approx. 30 minutes.

10. Brush with milk and bake in the centre of a preheated oven (200oC) for 35 minutes, or until golden brown and makes a hollow sound when the base is tapped.
Spiralling

Cool on a wire rack and enjoy warm with lots of butter, or part of an epic sandwich! It's really good to pull it apart along the layers when it's warm, it's delicious!

It will keep for 3/4 days in an airtight container, depending upon the fillings you've used!

Happy Baking!

The Baking Ginger xx
Before second proofing
Finished couronne, with all the layers

Monday 7 October 2013

Cheat's Triple Millionaire's Shortbread

My Gran's Millionaire's Shortbread is my absolute favourite thing (although it is a close contest with Cheese Scones...). These are a bit of a cheat's version; they're made with Dulce De Leche, instead of the home made caramel which makes Gran's extra delicious, but they're a fantastic quick fix - waiting for them to be properly chilled is the hardest part!

You can get Dulce De Leche from any good supermarket, so give these a go!


Breadcrumbs

Cheat's Triple Millionaire's Shortbread


Makes 24 pieces

Ingredients


12oz plain flour
8oz butter/marg
5oz caster sugar

450g jar of Dulce De Leche
250g chocolate (I used 75g white, 75g milk and 100g dark chocolate for the triple effect)
Baked shortbread base

9x13in tin
170oC fan oven/180oC other ovens

Method


1. Rub the butter into the flour until it resembles breadcrumbs, then mix in the sugar.

2. Press the shortbread mix into a greased and lined baking tray, doing it this way makes the shortbread extra crumbly, which goes perfectly with sticky caramel.
Chocolate and Dulce De Leche

3. Bake the shortbread base in the centre of a preheated oven until very light golden brown, approx. 20/25 minutes.

4. Whilst the shortbread is baking weigh out the chocolate.

5. Once the shortbread is baked, leave to cool in the tin for 5 minutes then put in the freezer for 30 minutes to chill properly before you add the caramel.

Caramel layer before chilling
6. Once chilled spread the caramel over the shortbread, then put the whole thing back in the freezer for at least another half an hour or until the caramel feels solid enough to spread chocolate over.

7. Melt the chocolate (in a microwave is fine if you do it for 15 seconds then stir and microwave again if needs be), spread gently over the caramel - if you're using three types of chocolate start with the white first so you don't get any colour contamination. 

8. Chill in the freezer for another hour/fridge for at least 3 until the chocolate is completely hard.

9. Cut into 24 pieces; do this in the tin as it stops any slightly soft caramel escaping out of the sides of your Millionaire's. 

These are best enjoyed with a cup of tea, perfect for elevenses or afternoon tea! They'll keep in the fridge for up to a week, if they last that long...
Triple Chocolate!

This really is a great little cheat, it's not as good as Gran's, but when is anything ever as good as when your Gran bakes it?! 

Happy Baking,

The Baking Ginger xx


Finished Trio

Sunday 29 September 2013

Poppy Seed Bagels

Finished bagels!

I didn't realise how few ingredients bagels needed until I started researching recipes for them, there's no excuse not to try them as they're made with things you'll find in any vaguely well stocked baking cupboard.

The hardest thing I found to do was shape the bagels, the first one or two were slightly lumpy but I soon got the hang of it, practice makes perfect, which is the perfect excuse to make these time and time again! It is definitely a recipe I'll be going back to, next I'm thinking cinnamon and raisin bagels, but that's for another time!


Activated yeast


Poppy Seed Bagels


Makes 9

Ingredients:

450g bread flour
4tbsp sugar
2tsp salt
1 sachet dried yeast (7g)

Rough dough
2tbsp milk
2tbsp poppy seed


190oC fan oven/200oC other ovens

Method:

1. In a large bowl add 100ml of warm water to 1tbsp sugar and the sachet of yeast. Leave for 10 minutes to activate the yeast - you'll start to see bubbles appear on the surface of the liquid.

2. Add another 200ml of warm water to the bowl, followed by half the flour and the 2tsp salt. Mix into a dough, and add the rest of the flour in stages until you get a soft, but not sticky dough, you might not need all of the flour.

Smooth, kneaded dough

3. Turn the dough out on a lightly floured surface and knead gently for 10 minutes until the dough is smooth and elastic. (See this previous blog about the best kneading technique.)

4. Once smooth put the dough into an oiled bowl, covered with oiled cling film and leave in a warm place until doubled in size - approx. 1 hour, but don't be afraid to leave it for longer.

5. Turn the doubled dough out onto a lightly floured surface and cut into thirds and then thirds again to get nine equal portions. Knead each into a smooth circle and then roll between your palms to get a smooth ball.

Making the hole
6. Put a large ban of water onto boil and add the remaining 3tbsp sugar. Bring to a rapid boil.


7. Meanwhile, to make the bagel's characteristic hole press your thumb into the centre of each dough ball, then pick it up, work your other fingers into the space, making the hole bigger by gently pulling the dough outwards and cycling it around between your index fingers. Make the hole approx 3cm across. Repeat for all 9 dough balls.

8. Now your sugary water should be boiling, so add the bagels to the water (do as many in a go as you can fit in the pan without them touching each other or the sides), boil for 1 minute on each side and then remove from the water onto a wire rack with a slotted spoon.

Cycling between your fingers
9. Once you've boiled all of the bagels put the milk in a shallow dish and the poppy seeds in another. One at a time, place a bagel face down in the milk, and then straight into the poppy seeds. Place seeds face-up onto a lightly greased baking tray. Repeat for all of the bagels.

10. Bake in the middle of a preheated oven for 20-25 minutes, or until they're golden brown and sound hollow when tapped on the bottom.

11. Cool on a wire rack. These will keep for 3-4 days if kept in an airtight container, but they're best enjoyed whilst still warm from the oven with lashings of butter...

Boiling bagels!
The poppy seeds in this recipe are entirely optional; you can have plain bagels instead, simply glaze with a beaten egg before baking, or add any other seeds of your choice, again using milk as glue.

Like I said, I was really impressed with how simple these were, I can't wait to start experimenting with flavour combinations soon!

Happy Baking!

The Baking Ginger xx


Finished article!

Being topped


Ready for the oven

Wednesday 25 September 2013

Chewy Chocolate and Nut Cookies

Baked and ready to be eaten!
I made these at the same time as the Salted Nutella Cookies and I've got to admit, I think I prefer these; I'm a big fan of nuts in anything...

The trick to making them really chewy is the light muscovado sugar, if you've only got white sugar that'll work too, your cookies just won't be so chewy and gooey!

They'd work really nicely for elevenses, as part of a spread for afternoon tea, or hot from the oven with loads of vanilla ice cream - yum!


Chewy Chocolate and Nut Cookies


Makes 20 large cookies

Ingredients


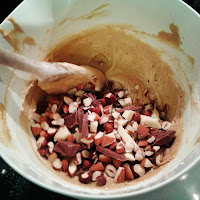
Mixture with nuts and chocolate

125g butter/marg
100g light muscovado sugar
125g caster sugar
1 egg
2tsp vanilla essence
225g self raising flour
small pinch of salt
100g chocolate pieces (I used white and milk chocolate)
100g nuts (I used chunks of almonds and hazelnuts)


170oC fan oven/180oC other ovens

Method


1. Cream the butter and sugar in a large mixing bowl until light and fluffy - once you think you've done give it another minute or so of beating to make your cookies as light as possible!

2. Beat in the egg and vanilla essence in two goes until it's all combined. If it curdles don't worry, it'll come back together when you add the flour.

Ready for the oven

3. Add the flour and salt, and mix until just combined then mix in the nuts and chocolate.

4. Put the mix in the freezer for 10 minutes or fridge for an hour just to make it easier to work with - it will be a very very sticky dough!

5. Once the dough is chilled, using two dessert spoons, put a walnut size ball of dough onto a lined baking sheet. Make sure the dough balls have at least 3 inches between them as they will spread massively whilst baking.

6. Bake in the middle of a preheated oven for 9 minutes; they may look raw in the middle still but they'll continue to cook as they cool and you'll end up with a gorgeous, chewy cookie once they've cooled on a wire rack - although as usual they're best when still warm from the oven!

Finished article!

I used the chocolate and nut combinations that I like, but the basic dough recipe can be adapted to suit your tastes, they're really flexible and once you've made one combination you'll really want to try others! You could add lemon zest to mixture to make the cookies fresh and bring out the flavour of the nuts, it really works, and would be great with other citrus fruits too!

They'll keep for 4-5 days in an airtight container.

Happy Baking!

The Baking Ginger xx


Salted Nutella Cookies

These are another bake I've invented based around Kate's love of Nutella...

They're dead easy - only 5 ingredients, no chilling time and a dozen gorgeous cookies at the end, what more could you ask for??

I only added the salt to half of the cookies, as it was a bit of an experiment, but it worked really well so I'd definitely recommend adding it to the top of each cookies, although if you're not keen they're still delish without!
Ready for the oven - they're so easy!


Salted Nutella Cookies


Makes 12

Ingredients

300g Nutella
2tbsp any sugar (brown sugar makes cookies chewier)
1 egg (beaten)
65g plain flour
50g chocolate chips (I used half white chocolate, half milk chocolate)

Optional: 12 small pinches of salt (sea salt flakes work best)

170oC fan oven/180oC all other ovens
Baked and ready for eating up!

Method


1. Combine all of the ingredients in a bowl and mix thoroughly until everything is incorporated.

2. Use your hands to roll walnut size pieces of dough into balls and squash down slightly onto a lined baking tray. Place the dough balls with at least 2 inches between them as they spread a lot whilst cooking.

3. If you're going to add salt, put a small pinch onto of each cookie now.

4. Bake in the centre of a preheated oven for 10 minutes - don't worry if they still look a bit raw in the middle when you take them out, this will mean they're gooey and chewy once they've cooled!

5. Leave to cool slightly, but these are definitely beset enjoyed warm out of the oven. If there's any left they'll keep for 2-3 days in an air tight container.

These are so easy, quick and delicious, you've really got to try them!

Happy Baking,

The Baking Ginger xx

Wednesday 18 September 2013

Four Shades of Biscotti

Biscotti varieties
Biscotti is something I’ve wanted to make for a while, I’ve read a lot about it and it seems like a really versatile thing, which I decided to put to the test by making 4 varieties at once! These are really crispy biscuits because of their high sugar/low fat content, as well as the fact they're baked twice.

They were all delicious; white chocolate, almond and lemon was my favourite, but play around with what you like to find your favourite combinations. If you want to make all one type of biscotti quadruple the flavourings, or double if you want to make two flavours.

Flavour combinations


4 Shades of Biscotti 


Makes 30 portions (7/8 slices of each)

Ingredients:


12oz plain flour
1.5tsp baking powder
12oz caster sugar
4 eggs (beaten)
Dough coming together

-          Lemon, Almond and White Chocolate
o       zest of 1 lemon
o       2oz whole almonds
o       2oz white chocolate
-          Milk Chocolate and Hazelnut
o       2oz whole hazelnuts
o       2oz milk chocolate
o       1tsp vanilla essence
-          Pistachio, Blackberry and Orange
o       2oz pistachios shelled
o       2oz fresh blackberries
o       zest of 1/3 orange
-          Chocolate and Orange
Dough + flavourings
o       4oz plain chocolate
o       zest of 1 orange

150oC fan oven/160oC all other ovens

Method:


1. Mix together the flour, sugar and baking powder using your hands then add an egg at a time and bring the dough together with your hands. 


2. Divide the dough into four and work on a portion at a time, the dough is very soft and sticky so make sure you’ve got extra flour to hand to keep things moving. 
After first bake

3. For each type of biscotti add the additional ingredients and knead gently to incorporate. Shape into a log, put on a lined baking tray and put into the middle of a preheated oven for 30 minutes. Spread the biscotti out as they’ll spread as they cook. 

4. Repeat for each type of biscotti – you can do them simultaneously if you like; whatever you find easiest! N.B. The blackberry and pistachio flavourings make the dough very wet, so add a few more tbsp of flour to compensate. 

5. Once they’ve been in the oven for 30 minutes cool slightly on a wire rack (for approx. 30 minutes) then slice into 1-2cm thick slices, return to the baking tray and bake for another 5 minutes on each side (another 10 in total), or until golden brown. 
Ready for second bake

6. Cool on a wire rack, then serve with hot chocolate, coffee or tea – they’re perfect for elevenses as they're best dunked! They will keep for 3/4 days in an air tight container.

Versatile, delicious and very cute; they’d make a great present wrapped in shiny wrap paper and tied with ribbon or in a box with tissue paper – perfect!

Happy Baking, 

The Baking Ginger xx

Lemon, Almond and White Chocolate
Pistachio, Blackberry and Orange
Hazelnut and Milk Chocolate


Plain Chocolate and Orange