Monday 1 December 2014

Triple Chocolate Brownies with a Bourbon Biscuit Base


These are a really rich brownie, packed with bourbon biscuits and chocolate. They're great with a hot cup of tea, or a glass of milk if you're feeling nostalgic!


Triple Chocolate Brownies with a Bourbon Biscuit Base

Bashed up Bourbon biscuits

Makes 24 pieces

Ingredients:

Bourbon Base:
50g plain flour
400g Bourbon biscuits (plus approx. 10 extra for decorating the top of brownies)
100g dark brown sugar
100g unsalted butter
125g golden syrup

Brownie Topping:
250g chocolate (a mixture of dark and milk, depending on what you prefer)
250g unsalted butter
4 large eggs
150g dark brown sugar
1 tsp vanilla extract
75g plain flour
0.25tsp baking powder

1 tbsp cocoa powder
Biscuit base before cooking
 250g chopped chocolate (any combination of dark, milk or white chocolate)
Pinch of salt

Oven at 180oC fan/190oC electric

Method:

1. Crush the Bourbon biscuits in a bowl - either crumbling them with your hands, or with the end of the rolling pin - then add the flour and mix together.


2. In a pan over a medium heat, mix the butter sugar and syrup in a pan and stir until the butter has melted and everything is combined.


3. Add the butter mix to the Bourbon mix and stir until combined.


4. Press the mix into a lined and greased baking tray and bake in the centre of a preheated oven at 180oC for 10-15 mins, until it is getting slightly browner around the edges, and is starting to resemble a sponge-like mix.

Cooked base and raw brownie topping


5. Whilst the base is baking make the brownies; heat the butter and 250g of chocolate over a bain marie until smooth.


6. In a separate bowl, combine the eggs, brown sugar and vanilla extract. Whisk until the mix is pale and thick.


7. To the egg mix, add the flour, cocoa, baking powder and chocolate and salt. Stir gently until smooth.


8. Once it’s cooled slightly, carefully add the melted butter and chocolate to the egg and flour mix, taking care not over mix or the chocolate will seize and go grainy.


9. Once the Bourbon base is cooked, pour the brownie mix over the top. Cut up the remaining 10 Bourbon biscuits in half diagonally and press gently into the top of the raw brownie mix. Return to the oven for a further 25-30 minutes.


10. To test the brownie use a skewer or sharp knife; you want to take the brownies out of the oven when the skewer comes out slightly dirty still, so your brownies will still be fudgy once they’ve cooled.
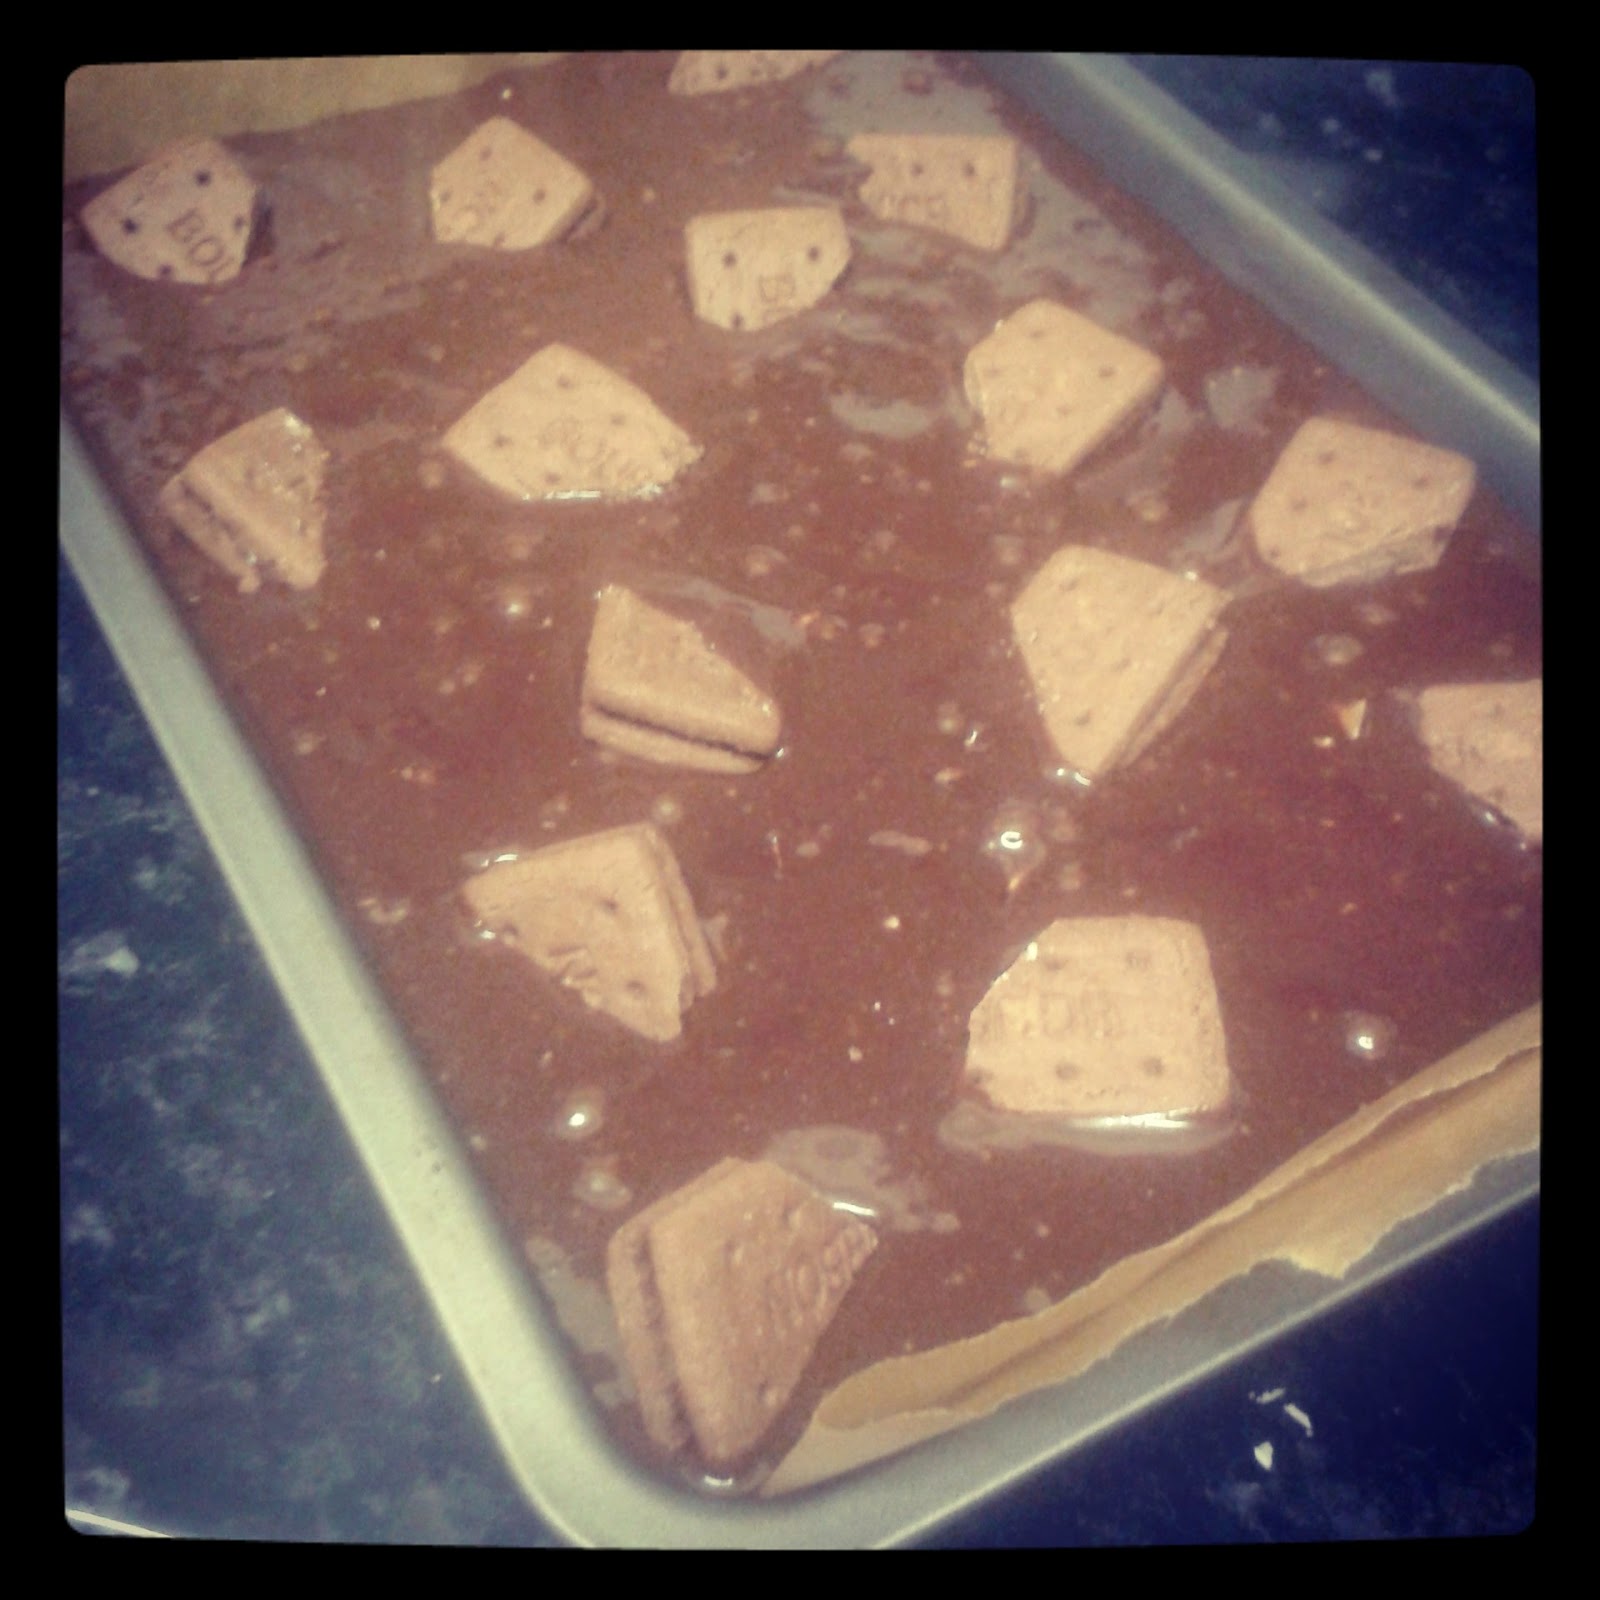
Brownies before baking


11. Once baked leave to cool and set in the tin - they will be very soft, but leave them to cool completely and they'll set up nicely. Cut into 24 pieces and serve.


These are best a day or two after baking, as the base becomes slightly less sweet, but still cuts through the richness of the brownie topping.

They'll keep for up to a week in an airtight container.

Happy Baking,
Cooked brownies


The Baking Ginger xx

Brownies ready to eat!

Monday 13 October 2014

Chocolate and Nut Brownies with a Salted Pretzel Base


I got the recipe for the pretzel base of these brownies from a friend at work who's an amazing baker, and the brownie topping is my go-to brownie recipe - always delicious and very versatile; add whatever combination of chocolate pieces and nuts you want. If you like salted caramel you'll love these! They are totally worth the two step process, and a great twist on a classic.


Chocolate and Nut Brownies with a Salted Pretzel Base


Makes 24 pieces

Blitzed pretzels

Ingredients:


Pretzel Base:
65g plain flour
150g salted pretzels
100g dark brown sugar
100g unsalted butter
125g golden syrup


Brownie Topping:
250g chocolate (a mixture of dark and milk, depending on what you prefer)
250g unsalted butter
4 large eggs
175g dark Muscavado sugar
Pretzel base before baking
1 tsp vanilla extract
75g plain flour
0.25tsp baking powder
1 tbsp cocoa powder
200g chopped nuts (I used pecans and hazelnuts)
100g chopped chocolate (again; dark, milk or white chocolate)
Pinch of salt

Oven at 180oC fan/190oC electric

Method:


1. Blitz the pretzels in a food processor, or crush the end of a rolling pin, then add the flour and mix together.

2. In a pan over a medium heat, mix the butter sugar and syrup in a pan and stir until the butter has melted and everything is combined.

3. Add to the pretzels to the butter mix and mix together until combined.
Baked base


4. Press the mix into a lined and greased baking tray and bake in the centre of a preheated oven at 180oC for 10-15 mins.

5. Whilst the base is baking make the brownies; heat the butter and 250g of chocolate over a bain marie until smooth.

6. In a separate bowl, combine the eggs, Muscavado sugar and vanilla extract. Whisk until the mix is pale and thick.

7. To the egg mix, add the flour, cocoa, baking powder, chopped nuts and chocolate and salt. Stir gently until smooth.

8. Once it’s cooled slightly, carefully add the melted butter and chocolate to the egg and flour mix, taking care not over mix or the chocolate will seize and go grainy.
Egg Mix


9. Once the pretzel base is cooked, pour the brownie mix over the top and return to the oven for a further 20-25 minutes.

10. To test the brownie use a skewer or sharp knife; you want to take the brownies out of the oven when the skewer comes out slightly dirty still, so your brownies will still be fudgy once they’ve cooled.

11. Once baked leave to cool and set in the tin. Cut into 24 pieces and serve - they're great warm out of the oven with vanilla ice cream...


Ready for the oven!
These will keep for 3 or 4 days in an airtight container, but they definitely won’t hang around long enough for you to find that out!

Happy Baking!


The Baking Ginger xx


Pretzel Brownie Stack for Mum's Birthday :)

Saturday 2 August 2014

Mandarin Cheesecake

Retro Mandarin Cheesecake!


This isn't technically baking... there's actually no cooking involved in making it at all... but it's delicious all the same! I made it for dessert for Mum and Dad's 27th wedding anniversary, with Dad's favourite cheese and onion pie for the main course!

It's an adaptation of Gordon Ramsey's cheesecake for his Cook-a-long Live, so it's really simple, quick and delicious - what more would you ask for in a pudding?!


Manadrin Cheesecake


Serves 6/8 generously
Fine biscuit crumbs

Ingredients:


Base:
- 175g digestive biscuits
- 75g butter

Filling:
- 400g fullfat cream cheese
- 1 vanilla pod
- zest of 1 orange
- 100g icing sugar
- 300ml double cream

Topping:
 Buttery biscuit base
- 400g tinned mandarins

20cm springform cake tin, or 6/8 individual serving dishes


Method:


1. Lightly grease a 20cm/8" spring-form cake tin with butter.

2. Make the base by smashing up digestives with a rolling pin, until they resemble fine breadcrumbs.


3. Melt the butter in the microwave, usually doing it at 10/20 second intervals until it's liquid. Add the butter to the digestives and mix until they're all coated.

De-seeding the vanilla
4. Press the biscuits into the base of the greased tin, so they form an even, compact layer. Put in the fridge to chill for at least an hour, so you can spread the filling on top easily.

5. Once your base has set you can make the filling; in a bowl whip the double cream to soft peaks.

6. In a separate bowl beat the cream cheese into a smooth paste - should only take 10 seconds or so. Split the vanilla pod open, scrape out the seeds and add to the cream cheese. Zest the orange using a microplane grater and add it to the cream cheese too. Mix to combine.

7. Add the icing sugar to the cream cheese and mix slowly until it's combined so you don't cover yourself in it!

8. Fold the whipped cream through the cream cheese, spoon onto the base and level out with a palette knife.

Cream cheese and cream combined
9. Put back in the fridge for at least an hour to let it the topping firm up.

10. When you're ready to serve, drain the mandarins and arrange on the top, serving any extras on the side, or scatter all of them over the top of the cheesecake.

This cheesecake will last for 3/4 days in the fridge after you've made it, but as usual, it won't last a day in our house!

Happy Baking,


The Baking Ginger xx


Ready to eat!
Ready to chill!


P.S. I don't feel like I can post this recipe without including this... enjoy!


Wednesday 9 July 2014

Carrot, Sultana and Mixed Spice Muffins


Finished carrot muffins


These are another type of muffin I've created to take to work with me. An adaptation of carrot cake, they're really moist, and heady with mixed spice, which I love, but if you're not such a fan you can always reduce the amount in it.

In another change from previous muffins I also decided to sprinkle some oats on top of the muffins, just for a different texture; they work really well I think!


Carrot, Sultana and Mixed Spice Muffins


Dry Ingredients

Makes 10/12 muffins

Ingredients:


100g wholemeal/wholegrain flour
50g oats
50g brown sugar
1 large handful of crushed branflakes
75g sultanas
0.5tsp baking powder
0.25tsp bicarbonate of soda
1.5tsp mixed spice

1 grated carrot (approx. 50g)
3tbsp vegetable or sunflower oil
juice of 1 satsuma/clementine

Wet Ingredients

100-200ml milk (enough to make a loose, pourable batter)

180oC fan oven/190oC other ovens

Method:


1. Mix the dry ingredients (keep a small handful of the oats back to sprinkle on the top of the muffins before baking).

2. Mix the wet ingredients, apart from the milk.

3. Combine the two mixtures, beat into a batter and add enough milk to make a loose, pourable batter.

4. Divide between 10/12 bun cases in a bun tray and sprinkle on the left over oats.

5. Bake in the middle of a preheated oven for 15/20 minutes, or until a knife comes out of the centre of a muffin clean.

Combined Batter

6. Cool on a wire rack, store in an airtight container until you need them.

Like I said, these are delicious, really simple, and a sustaining snack for a busy day - perfect!


Happy Baking!


The Baking Ginger

Ready to eat!

Ready for the oven


Saturday 5 July 2014

Banana, Honey and Cinnamon Muffins

Finished muffins
 I made up this recipe from an amalgamation of several others I’d seen online; I wanted to make something that I could take for lunches at my new job – so it had to be filling and sustaining, hence the wholemeal flour and oats! I also wanted to use some of the delicious thyme flavoured honey my Mum and Dad brought me back from their recent trip to Cyprus.

This recipe makes 6 large muffins, approx. 180 calories each, and they’ll keep in an airtight box all week for your lunchbox! It’s easily doubled if you want to make a batch for afternoon tea.


Dry Ingredients

Banana, Honey and Cinnamon Muffins


Makes 6 large muffins, or 10/12 normal size buns as I've done here.

Ingredients:

100g wholemeal/wholegrain flour
50g oats
50g brown sugar
large handful of crushed branflakes (optional)
0.5tsp baking powder
Wet Ingredients
0.25tsp bicarbonate of soda
1tsp cinnamon

1 banana, thoroughly mashed
1tbsp honey
3tbsp vegetable or sunflower oil
1tsp vanilla essence
100-200ml milk (enough to make a loose, pourable batter)

180oC fan oven/190oC others


Pourable Batter with Milk

Method:

1. Mix the dry ingredients in a bowl

2. Mix the wet ingredients in a separate bowl, apart from the milk

3. Combine the two mixtures, beat into a batter and add enough milk to make a loose, pourable batter

4. Divide between 6 muffin cases (or more if you're making them smaller) in a bun tray

5. Bake in the middle of a preheated oven for 15/20 minutes for large muffins, 10/15 minutes for small muffins, or until a knife comes out of the centre of a muffin clean

6. Cool on a wire rack, store in an airtight container until you need them
Ready for the oven!


Like I said, these will keep for up to a week in an airtight container, if they get a little dry 30 seconds in the microwave just before eating will freshen it up! They’d make a great pudding with some custard too!

Happy Baking!


The Baking Ginger xx


Finished muffins

Wednesday 18 June 2014

Chocolate Éclairs with Crème Légère

Finished Éclairs

Today myself and Katie thought we'd make something that we've read a lot about and seen a lot of, but never actually attempted ourselves before; crème légère, which is essentially crème pâtissière, or custard (the thing we'd never made from scratch before) and whipped cream. It was a pleasant surprise how easy the crème pâtissière was to make, and how delicious it was with the extra cream folded through too! The éclairs recipe is adapted from a BBC GoodFood post, and was also surprisingly quick and simple to make, the effort is definitely worth it! 


Chocolate Éclairs with Crème Légère


Makes approx. 16 éclairs
Egg yolk mix before adding milk


Ingredients:


Éclairs:
140g plain flour
pinch of sugar
pinch of salt
125ml milk
125ml water
100g butter
4 eggs


Adding flour to choux mix
Crème Légère:
300ml milk
50g caster sugar
2 egg yolks
1.5tsp vanilla extract
4tsp plain flour
4tsp cornflour
300ml double cream

100g milk chocolate for coating

200oC oven/180oC fan oven

Method:
Chilling dough

1. Start by making the crème pâtissière filling; first heat the milk until almost boiling in a saucepan. Meanwhile, mix together the sugar, egg yolks and vanilla in a bowl, then stir in the flours, a couple of tsp at a time, to a smooth paste. 

2. Once the milk is almost boiling, gradually whisk it into the egg yolk mix, pour everything back into the saucepan and cook over a high heat, stirring constantly, for about 5 mins until thick; keep stirring it vigorously with a wooden spoon until smooth. 

3. Pour into a bowl, lay a sheet of cling film directly on the crème pâtissière surface, then cool and chill until you’re ready to fill the éclairs.

Smooth dough with eggs

4. Put the milk, water and butter into a medium saucepan and gently heat so the butter melts but the liquid doesn’t boil. Once the butter has completely melted, increase the heat until the liquid comes to a fast rolling boil. 

5. Immediately turn off the heat, tip in the flour, sugar and salt and beat vigorously with a wooden spoon until you a have a smooth dough that comes away from the sides of the pan. Remove from the pan and leave to cool until it's almost room temperature - to speed this up you can spread it over a large dinner plate and place in the freezer for one minute.
Piping dough

6. Once the dough mix has cooled, scrape it back into your pan. In a separate bowl, whisk the eggs and then gradually beat them into the dough mix, approx a quarter at a time. Using your wooden spoon, beat after each addition until you have a smooth, shiny mixture.

7. Line a baking tray, or two, with baking paper and draw on 16/18 10cm long lines, at least 5cm apart. Turn the paper over so the lines are on the underside of the paper, or they'll transfer onto the bottom of the éclairs.

8. Fill a piping bag with the dough (use a 1/2cm nozzle), and pipe along the guidelines. Smooth any points on the éclairs down with a wet finger.

9. Bake in the middle of a preheated oven for 20/25 minutes, or until crisp and golden.

Eclairs after baking
10. Once baked, make a small slit in the base of each eclair with a sharp knife, turn upside down and bake for another 5 minutes to dry out the pastry cases. Set aside to cool on a wire rack.

11. Whilst they're cooling, you can make the crème légère; whisk the double cream until thick and it stands in strong peaks. Fold the cream into your cooled crème pâtissière.

12. Once the éclairs are cool, spoon the crème légère into a piping bag (this time with a long, thin nozzle), and gently fill each éclair with a generous helping of the crème légère - they'll feel heavy when they're full.

Creme Legere before piping
13. Melt the chocolate carefully in the microwave in a shallow bowl and then dip each of the filled eclairs into the chocolate, so they have an even coating. Set on a plate and leave the chocolate to set - it's best to keep them in the fridge.

These won't keep for very long once they're filled, approx. 1 day before they go soggy, but they're so delicious and moreish they won't be around for long! There's lots of alternative toppings you can put on them too, such as sprinkling with flaked almonds or chopped hazelnuts - they're a great starting point for lots of experimentation.

Happy Baking,


The Baking Ginger xx
Finished éclairs!


This is just something I saw this week and fell completely in love with! Enjoy!


Wednesday 28 May 2014

Caramelised Onion and Stilton Multigrain Spiral Rolls


Finished Rolls


Obviously I'm a fan of all baked goods, but these might be the best thing I've ever made; multigrain rolls are packed with sweet caramelised onions and punchy blue cheese. They’re great on their own (warm is best, or straight out of the oven!) or with a herby side salad or bowl of tomato soup. Cooking them side by side makes for crispy tops and soft, bouncy sides, but the fillings would be equally delicious worked through the whole dough to make a large loaf – whatever suits your needs!


Dough, pre-rising

Caramelised Onion and Stilton Multigrain Spiral Rolls


Makes 16/18 rolls

Ingredients:

Dough:
500g multigrain bread flour (or strong white)
25g/1oz marg or butter
2 tsp salt
2 tsp/7g dried yeast
350ml warm water

Filling:
4 onions, very finely sliced
2 tsp butter or marg
2 tsp sugar (any variety)
Salt and pepper to season
225g stilton (or use any variety of cheese you like)
Doubled dough

milk to glaze

200oC oven/180oc fan oven

Method:

1. Rub the marg or butter into the flour until it resembles breadcrumbs, then add the yeast and salt (to separate sides of the bowl) and mix.

2. Add the warm water in stages until the dough comes together but isn't sticky.

Soft, golden caramelised onions
3. Turn out onto a floured surface and knead for 10 minutes, or until the dough is smooth and elastic.

4. Place into an oiled bowl, cover with oiled clingfilm and leave to rise in a warm place until doubled in size (at least 1 hour).

5. Whilst the dough is rising make the caramelised onions. Cook the sliced onions in a saucepan with a little oil over a low heat for 10 minutes, or until very soft and translucent, do not let the onions colour. Once soft, add the butter and sugar, continue to heat gently until everything is combined. Season to taste. Sieve the onions to remove excess liquid and set aside to cool.

Covered dough with fillings
6. Once doubled in size, turn the risen dough out onto a floured surface, knead gently for 30 seconds to knock it back and then roll the dough out into a rectangle (approx. 1m x 50cm).

7. Cover the rectangle evenly with the onions and blue cheese (broken into small pieces), tack one of the long edges to the work surface and then roll from the opposite long edge like a swiss roll - do it as tightly as you can. (I left a small portion of the dough without stilton as some of the people I was making it for don't like it).

8. Cut the ~1m long roll into approx. 5cm portions (you should get between 16/18 individual rolls, plus some scraggy end bits which you can just bake with the rolls).

Mid rolling
9. Place the rolls, cut side up into greased baking dishes; I used a rectangle dish and a round dish just to mix up the final loafs you’ll get.

10. Cover the rolls with oiled clingfilm and leave to rise again in a warm place for approx. 30 minutes.

11. Brush the rolls with milk and bake in the centre of a preheated oven (200oC) for 35/40 minutes, or until golden brown. Because of the oils from the cheese and onions you can't tap these rolls on the base to test for a hollow sound; you have to do it by the colour of the dough and the feel when pressed, you're looking for crispy exteriors that spring back when pressed. Turn out of the trays and leave to cool on a wire rack, or eat straight away... 

Sliced rolls before 2nd proofing
No two ways about it, these are delicious! They'll keep for up to a week in an air tight container, it's nice to reheat them in the oven for 10 minutes to refresh them if you're keeping them this long.

Happy Baking!


The Baking Ginger xx


Finished Roll!


Ready for the oven