Tuesday 27 August 2013

Two Way Lemon and Raspberry Cupcakes

Finished cupcakes


I made these for some new neighbours who've moved in next door, just as a way to say hello; they were much appreciated!

I couldn't decide whether to make lemon cupcakes with raspberry cream or raspberry cupcakes with lemon cream so I decided to do both - if you want to make them all the same way just double the flavouring you use for the cake and the cream, but the basic ingredients stay the same.


Two Way Lemon and Raspberry Cupcakes


Makes 12
Basic batter


Ingredients:


4oz self raising flour
4oz marg/butter
4oz caster sugar
2 eggs
1tsp baking powder
1 or 2tbsp milk

grated zest of 2 lemons
juice of 1 lemon
punnet (approx. 125g) raspberries
300ml double cream
Adding raspberries
2tbsp icing sugar

170oC fan oven/180oC all other ovens
12 hole bun tin, lined with cupcake cases


Method:


1. Combine all of the basic ingredients in a large bowl and beat into a smooth batter. You might need to add a splash of milk to get it to dropping consistency (when the batter drops off the spoon when picked up). 

2. Divide the batter in half. 
Ready for the oven

3. To one half add the zest of one lemon and the juice of half. Leave the other plain as you’ll add whole raspberries to it once it’s in the cases. 

4. Using teaspoons fill each cupcake cases until it’s 2/3 full of either the lemon or plain batters; to each case of plain batter case add a small amount of mixture then add 2 whole raspberries, then top up with the remaining portion of batter. 

5. Repeat until all of the batter is used then place the trays into the middle of a preheated oven for 10/15 minutes until the 
cupcakes are golden brown. 
Baked and cooling

6. Leave the cupcakes to cool completely on a wire rack whilst you make the toppings. 

7. Whip the cream to soft peaks, but ensuring it is firm enough to be shaped on top of the cupcakes. Sieve in the icing sugar and whisk gently until incorporated. 

8. Split the cream into two. To one half add the zest of the other lemon and a splash of lemon juice. In a separate bowl smash the remaining raspberries with a fork, add half of the sweetened cream and fold together so the cream starts to turn pink, whilst leaving some chunks of raspberry intact. 

Cream toppings
9. Once they’re completely cool top the lemon cupcakes with the raspberry icing and the raspberry cupcakes with the lemon icing.


These will keep for a day or two, if it’s warm keep them in the fridge so the cream doesn't melt. 

They're a really simple variation on a classic cupcake,very easy to play around with depending on what your fancy or the occasion you're baking for!

Happy Baking,

The Baking Ginger xx
Cakes on Gran's old cake stand


Thursday 22 August 2013

The Classics: Victoria Sponge with Jam and Cream

Sometimes the classics are the best, and you can’t go far wrong with a Victoria Sponge with raspberry jam and freshly whipped cream. I made this for our neighbour at our student house to say thanks for bringing our bins in for the past two years, and giving us vegetables from his garden.

It’s an all in one sponge, so is dead easy – literally put all of the ingredients in in one go and you’re done! The trick is not to mess around, I believe the key to a light and airy sponge is just to get on with it, so read the recipe first so you know what’s coming up.

Victoria Sponge with Jam and Cream


Classic Victoria Sponge

Ingredients:

6oz self raising flour
6oz caster sugar
6oz marg
1.5tsp baking powder
1 capful vanilla essence
3 eggs
Splash of milk

Filling/Topping:
caster sugar to dust
2/3 tbsp jam (raspberry is my fav)
250ml double cream (whipped)

2 x 8 in diameter cake tins (at least 2 inches deep), greased and lined

170oC fan oven, 180oC for all other ovens

Method:


  1. Put the flour, sugar, marg, baking powder, vanilla essence, eggs and a splash of milk into a large mixing bowl.
  2. Using an electric whisk (if you haven’t got one a wooden spoon and elbow grease will do!) beat the ingredients into a smooth batter, shouldn’t take longer than 2/3 minutes. I think the secret to a really light, moist sponge is not to over work the batter at this stage, so once everything is combined, stop mixing!
  3. Evenly divide the mixture between your two greased and lined tins, cleaning the bowl out with a spatula so as not to waste anything. Using a palette knife smooth out the surface of the batter, and make a slight indentation in the centre of each to ensure an even rise.
  4. Place side by side into the middle of your preheated oven for 15 minutes.
  5. To test if the cake is ready insert a sharp knife into the centre of each cake (or, if you’ve got one, I use a knitting needle to leave as small a hole in your cake as possible), if it comes out clean it’s ready, if not put it gently back into the oven for another 5 minutes then test again.
  6. Once cooked turn out of the tin onto a wire rack and leave until completely cold.
  7. Once they’re completely cold pick which cake you want to be on top (I usually go for the one with the most even colouring/less visible holes from the knitting needle). On the cake making up the bottom of your sponge gently spread the jam, then move it to the plate you’re going to keep the cake on. You can also use a cake tin lid for this, and then use the tin upside to keep your cake in.
  8. Whip the cream into soft peaks and spread over the jam. Put the top cake gently on top of the creamed cake, sprinkle generously with caster sugar (using a teaspoon and tapping the handle is the easiest way to get an even sprinkling). 
Like I said, you can't beat the classics, and there really is nothing better than a slice of this iconic cake with a cup of tea! 

Once you're happy with this basic recipe you can start to experiment with flavours, decorations and combinations of the two, but that's for another time!

Happy Baking,

The Baking Ginger xx

Monday 19 August 2013

Gran's Peanut Butter Biscuits

This is a recipe from my Gran, I've had them lots of times when we've gone to visit her, but never made them before - they were part of my Mull baking spree, and I was surprised how simple they were. The key is the chilling step - it really does make everything after that easier and a lot less messy!


Peanut Butter Biscuits


Makes 40 (seems like a lot, but they keep for up to a week in an air tight container, if there's any left!)
Peanut Butter Biscuits ready to travel to Mull

Ingredients:

9oz butter
11oz peanut butter
16oz granulated sugar
1 egg
11oz plain flour
1tsp baking powder
large pinch salt
5oz peanuts (peeled and finely chopped)

Demerara sugar (optional)

150oC fan oven, 160oC all other ovens

Method:


  1. In a large mixing bowl using an electric whisk or wooden spoon cream the butter and peanut butter together until they’re thoroughly mixed.
  2. Add the sugar and continue to cream until the mixture has become pale and fluffy.
  3. Add the beaten egg gradually, beaten after each addition.
  4. Add the flour, baking powder, salt and peanuts and mix until combined.
  5. Cling film the bowl and chill in the fridge for at least 30 minutes – the longer you leave it for the easier the next bit will be!
  6. Once your dough is thoroughly chilled weigh out 1oz, roll into a roll between your palms and put onto a baking tray lined with greaseproof. Squash down slightly and sprinkle generously with demerara for extra crunch. Repeat for the rest of the mixture, ensuring the biscuits are well spaced out (with at least 2 inches between them).
  7. Bake in your pre-heated oven for 15 minutes, or until a light golden brown. If you want your biscuits slightly chewy take them out of the oven whilst they’re still soft, if you’d like them to have a good crunch to them cook them for a few minutes longer until crisp.
  8. Leave your biscuits to cool completely on a wire rack. They’re great with a cuppa or some proper coffee.

The Complete Mull Line Up


These were one of the most popular things I made for Mull, I'll definitely be making them again soon, they're so good!

Happy Baking!

The Baking Ginger xx

Sunday 18 August 2013

Cajun Spiced Flatbreads and Poppy Seed Rolls

Flatbreads
I am the world’s worst person at doing nothing; I usually watch telly and play card games at the same time or work and listen to podcasts and so when I found myself with an empty day I decided to bake two different types of bread I've been thinking about for a while. 

I started by making a basic bread dough and then split it in half and made Cajun Spiced Flatbreads and Poppy Seed Rolls simultaneously. I’ve only started with the basic dough recipe and then split it up into the method for the flatbreads and rolls, but if you’re going to use the whole of the basic dough to make one or other of these simply double the additional ingredients.

They’re both delicious, the Flatbreads made one of the best lunches I’ve had in ages!

Cajun Spiced Flatbreads and Poppy Seed Rolls


Basic Dough Ingredients:

Rolls
500g strong white bread flour
2tsp salt
1 x 7g sachet dried yeast
11floz lukewarm water

Flatbreads: (makes 4 large)

2tbsp Cajun seasoning, or equivalent (usually something with garlic, herbs, something hot and something smoky works really well)
oil for cooking (light olive or vegetable oil work well)

Poppy Seed Rolls: (makes 6 medium rolls)

milk for glazing (approx. 2tbsp)
2 tbsp poppy seeds
200oC fan/210oC other ovens

Basic Dough Method:

  1. Put the flour into a large mixing bowl, add the salt to one side of the bowl and the yeast to the other (so as not to kill the yeast), and mix.
  2. Add the water and mix into a dough (you might not need all of the water so add it in a few goes until you have a soft, but not sticky, dough).
  3. Knead for 10 minutes until smooth and elastic. See this blog for my tips on kneading and other bread baking techniques.
  4. Put your dough into an oiled bowl, covered with oiled clingfilm, and leave in a warm place until doubled in size (approx. 1 hour)
  5. Once doubled knock your dough back by kneading on a lightly floured surface for 2/3 minutes. This is your basic bread dough, ready for anything!

Flatbread dough


I divided mine in half and made Cajun Flatbreads with one half and Poppy Seed Rolls with the other.


For the Flatbreads:


Flatbread breads being cooked
a. Take half of the knocked back dough and on a lightly floured surface knead in 2tbsp of the Cajun seasoning, this should only take 2/3 minutes until it is fully incorporated.

b. Divide the dough into 4 and roll each portion out until they’re the same thickness as a 10p. Whilst you’re doing this have a frying pan or griddle heating up on the hob over a medium/high heat. 

c. Add a small amount of oil the pan and fry each flatbread for 2 minutes on each side, or until both sides are lightly charred and full of air pockets. 

d. Repeat for the rest of the flatbreads, adding small amounts of oil as required. 
Filled with salad ready to eat!

e. These are best enjoyed warm out of the pan stuffed with fresh crispy salad – delicious! They don’t keep especially well, so best just to make what you need and eat them fresh!


Roll dough


 For the Poppy Seed Rolls:


a. Take the other half of the knocked back dough, divide into six and form each portion into a circle – the easiest way to do this is to knead for 30 seconds and the dough will automatically take on the right shape. 

b. Repeat for all of the dough then place them all into an oiled baking tray, evenly spaced. 
With seeds added
c. Cover the tray with oiled clingfilm and prove for another 30 minutes in a warm place, or until doubled in size. 

d. Once risen brush generously with milk, sprinkle with a layer of Poppy seeds; only the bottom layer will stick so you don’t need to go overboard. 

e. Bake in a preheated oven (200oC fan/210oC other ovens) for 20 minutes or until they sound hollow when tapped on the base – cook for another 5 minutes and test again until you get the hollow noise. 


Finished rolls!

f. These make great sandwiches, or are nice toasted with something like scrambled egg. They’ll keep for 3 or 4 days in an air tight container.

Like I said, it would be just as easy to use all of the dough to make flatbreads, or the rolls, simply double the additional ingredients required.

I hope this demonstrates how flexible dough can be, and how many different things you can do with it (simultaneously or otherwise!) once you’ve mastered the basic technique!

Happy Baking!


The Baking Ginger xx

Friday 16 August 2013

Nutella Filled Shortbread

Nutella Filled Shortbread


Kate asked me to make some kind of Nutella based biscuit housing today, and this is what I invented!

It's a basic shortbread recipe pimped with vanilla and filled with enough Nutella to make a small horse hyper. 

They're really easy - the only time consuming thing is chilling the Nutella down and the dough too - it's an essential step or you'll end up with an epic chocolate mess, which isn't always a bad thing...


Quenelle of Nutella


Nutella Filled Shortbread


Makes 9 generous biscuits, depends on the size of your Nutella fillings

Ingredients:

4oz butter/marg
2oz caster sugar
6oz self raising flour
1 capful vanilla essence

9tsp nutella (or as many as biscuits you're aiming for - chilled in fridge for at least 2 hours or freezer for 1)
Nutella and Dough

Caster sugar for sprinkling

Baking tray with grease proof paper

170oc fan oven/180oc for any other oven

Method:

1. Cream the butter and sugar in a mixing bowl until it becomes light and fluffy.

2. Beat in the vanilla essence.

3. Gradually add the flour, stirring well after each addition. The dough will become much stiffer, but keep going until all of the flour is incorporated.

Mid-roll

4. Put the dough in the fridge for at least two hours to chill (along with the Nutella if it's not already chilling).

5. When everything is chilled make a quenelle of Nutella by passing it between two teaspoons until it's in a smooth oval shape, leave on one of the teaspoons whilst you shape the dough.

6. Take a small handful the dough, roll it between your hands into a ball and then flatten into disk about the thickness of a pound coin.

7. Put the quenelle of Nutella into the centre of the dough disk, bring the edges of the dough up around the Nutella and crimp together.

Ready to bake
8. Gently roll the Nutella filled shortbread between the palm of your hands to make it a uniform shape and then flatten slightly, place on the baking tray and sprinkle with caster sugar.

9. Repeat for the rest of the dough and then bake in the middle of a preheated oven for 10/15 minutes or until they turn a light golden brown.

10. Cool slightly on a wire rack, and then dig in!

Finished biscuits!


These are best enjoyed warm, when the Nutella is still molten - yum!

These are dead easy, and so flipping worth it!

Happy Baking!

The Baking Ginger xx


Perfection kneads practice...

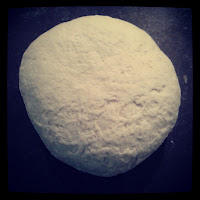
Dough coming together

I think the key to good bread is to perfect your kneading technique; practice makes perfect here, so get baking! If you want your bread to have a good texture and not resemble a house brick this is the place to put in the work.

Once you've mixed together your dry ingredients you should add enough warm water to your dough so it comes together to form a soft dough, but not so much that it becomes sticky, the easiest way to achieve this is to add it in stages. Once you've done this and turned your dough out onto a lightly floured surface you're ready to knead!

I’ve tried to illustrate my Gran's technique in these photos, it’s very reliable:

Dough ready to be kneaded


1. Form your dough into a circle, pull out from the edge of the dough away from you

2. Lift it back up over itself into the middle of the dough

3. Press into the centre of the dough with the heel of your hand

4. Turn the dough 45 degrees and repeat - simple!


Step 1
Step 2
Step 3
Step 4
Dough halfway to smooth!


For a standard bread recipe of 1-1.5lbs flour your dough will need to be kneaded for approx. 10 minutes to make it smooth and elastic.

Leaving the dough in a warm place for approx. an hour should be sufficient for it to double in size – but don’t be afraid to leave it for longer if it hasn’t quite doubled yet. I find the top oven over a main oven which is preheating for the actual baking event is the best place to leave your dough to rise.


In oiled bowl ready to rise
The risen dough

Once you've mastered this technique a whole world of dough cookery opens up to you, it really is worth trying to perfect!

Happy Baking!

The Baking Ginger xx


Portable Crumbles

I made these to take on our trip to Mull after Dad asked me to use up some cornflakes he didn't want, so they were a pretty spontaneous amalgamation of recipes I found from a quick Google. They were the surprise hit of the holiday and were the first tin to be emptied!

They're a lovely combination of a cornflake and oat crumbly shell encasing a sweet mouthful of fruity jam - they really are perfect for afternoon tea, but I think they'd be just as good with a healthy portion of custard too!

Cornflake and Oat Crumble Bakes

Cornflake and Oat Crumble Bakes

Makes 12, easy to double


Ingredients:

3oz butter
4oz plain flour
0.5tsp baking powder
2oz oats
2.5oz demerara sugar
2oz cornflakes (crushed)
6 heaped tsp jam (any fruit jam, marmalade or even lemon curd also works well)

12 hole bun tin
170oC/340oF/Gas mark 4 fan oven, 180oF/360oF/Gas mark 5 for all other ovens

Method:

  1. Put the flour, baking powder and butter into a large bowl and run into breadcrumbs.
  2. Add the sugar, oats and crushed cornflakes and mix well.
  3. Thoroughly grease the bun tin.
  4. Use your hands to compress a small handful of the oaty mixture into a disc and press it into one of the holes in the bun tin. Repeat until all 12 holes are filled and half of the oaty mixture remains in the bowl.
  5. Place a headed tsp of the preserve of your choice into the middle of your 12 oaty discs.
  6. Again use your hands to compress a handful of the oaty mixture into a disc and sandwich it over the preserve, in a lid-esque style, and seal the two together. Repeat for all 12 bun tin holes.
  7. Bake in the middle of a preheated oven for 20 minutes, or until they’re a golden brown colour and you can hear the preserve inside bubbling.
  8. Once cooked remove from the oven and leave to cool completely in the tin – it makes them an awful lot easier to remove! Once cooled remove and enjoy with a cuppa!
 They travel well, and will keep for up to a week in an air tight container.

I'll leave you with another picture of the beautiful Mull scenery!

Happy Baking!

The Baking Ginger xx
A view from Ulva

Wednesday 14 August 2013

Procrasti-baking and the Cinnamon Rolls

During my exams baking was a life saver! It's my complete escapism, and was such a great stress buster when times got tough!

A house-mate of mine was a massive cinnamon fan, especially having spent a year in Canada with Tim Hortons and CinnaBon on tap, so in homage to him I decided to make Cinnamon Rolls. I've never worked with a sweet enriched dough before, but I was surprised how easy it was, having been expecting a big sticky mess to develop!

This is an adapted Mary Berry recipe (my admiration for Mary Berry is worthy of a whole blog on it's own, so we'll save that for another day!) and as I was feeding a cinnamon fanatic I upped the cinnamon content in the dough itself, and in the for filling of the rolls - they went down an absolute treat!


Cinnamon Rolls
The finished rolls

Makes 16


Ingredients:

Rolls:
2lbs plain flour
1oz caster sugar
1tbsp cinnamon
7g sachet dried yeast
1tsp salt
12floz lukewarm milk
2 eggs (beaten)
1oz butter (melted)

Filling:
2oz caster sugar
1 tbsp cinnamon

Icing:
7oz icing sugar
4tbsp water
1tbsp vanilla extract

170oC fan oven, 180oC other ovens


Method:

1. Put the flour, cinnamon and sugar into a bowl and mix. Add the salt at one side of the bowl, and the yeast at the other so as not to kill the yeast, then mix everything together.

2. Make a well in the centre of the flour mix and pour in the milk, eggs and butter. Combine using your hand to make a dough - it will be sticky, don't worry about this!

3. Turn the dough out onto a floured surface and knead until smooth and elastic, which should take approx. 10 minutes (see my other blog for the best kneading techniques)

4. Roll the dough out into a large rectangle, approximately 1m by 35cm, (yes, it's big!). The dough should be approx 0.5cm thick.

5. Sprinkle the sugar and cinnamon for the filling all over the dough rectangle and rub lightly until combined.

6. Tack one long edge of the rectangle to your work surface (squish the edge down into the work surface to make it stick) and then being to roll up the rectangle from the other long edge (the one that isn't tacked to the work surface). Once you reach the tacked side of dough keep rolling over the tacked edge and it should stick to the rest of the roll and seal it, if not gently press the edge into the roll to seal.

7. Using a sharp knife trim the ends of the roll to get smart edges then cut the roll in half, and half again - repeat this until you have 16 individual cinnamon rolls.

8. Place the rolls, spiral facing up into lightly pre-greased baking tins - I used an 8 inch spring form tin to make a crown of rolls from 7 individual rolls and fitted the remaining 9 into a 10 inch square tin, but any baking tins will do with the buns spaced with approx 2 inches between them.

9. Cover the rolls with oiled cling film and place in a warm place to rise until they've doubled in size, which will take about an hour, but don't be scared to leave them longer if they haven't doubled within the hour!

10. Once they've doubled in size, remove the cling film, brush with a little milk and put into the middle of a preheated oven for 30-40 minutes until a light golden brown.
11. Whilst the rolls are cooling in their tins make up the icing by combining the water, icing sugar and vanilla extract in a bowl and beating into a smooth paste. Whilst the rolls are still in their tins and warm out of the oven  brush with the icing. 

12. Leave the rolls to cool slightly in their tins and once the icing has set remove from the tins and leave to cool on a wire rack.

Enjoy whilst still warm with a cup of coffee. They're really good microwaved for 30 seconds to warm them through, and will keep for up to 4 days in an air tight container.

Crown of Rolls
I was really proud of my first ever attempt at Cinnamon Rolls, and it turns out they're very photogenic too, so they got the honour of being my blog background! If you're looking for somewhere to start with enriched doughs, you won't find much better than here!

Happy Baking!

The Baking Ginger xx

Tuesday 13 August 2013

Ginger, Nut and Chocolate Slices from Mull

Thought I'd add some more recipes from my baking for Mull; this is a really simple no bake slice, if you're a big ginger fan (and who isn't?!) you can add diced preserved stem ginger for extra gingery-ness.
Gingery nutty goodness!


Ginger, Nut and Chocolate Slices


Makes 24


Ingredients:

6oz marg/butter
1.5tbsp syrup
1.5tbsp cocoa
1.5tbsp sugar
8oz chopped hazelnuts
8oz ginger nut biscuits

8oz white chocolate


Method:


  1. Melt the marg, syrup, cocoa and sugar in a pan over a medium heat, stirring regularly – but don’t let the mixture boil.
  2. Put the biscuits in a food bag and bash with a rolling pin (hold onto the opening of the bag, but don’t tie it up or it’ll pop and you’ll be in for a whole world of crumbs!). Bash until the biscuits are in fine crumbs.
  3. Once the marg mixture has melted add your biscuit crumbs and the chopped hazelnuts. Stir until they’re all combined then tip into a greased and lined baking tin (approx. 8x12 in) and compress using the back of a dessert spoon. Make sure to get into the corners of the tin, go around the edges and get a flat top to your ginger, nut and chocolate mix.
  4. Chill in the fridge (4 hours) or freezer (2 hours).
  5. Once the base is chilled break the white chocolate into small pieces and microwave in a microwaveable container until the chocolate has melted (stir regularly to make sure your chocolate doesn’t burn).
  6. Pour the white chocolate over the chilled base and smooth out using a palette knife. Chill in the fridge until the chocolate has set (approx. 4 hours).
  7. Cut into 24 pieces – it’s very rich so you don’t need much, and enjoy! It’s lovely for elevenses with a strong coffee.
These are so easy, you can't not give them a go!

Happy Baking!

The Baking Ginger xx